
What is the Best Lighting for Food Photography?


Lighting is the language of photography.
In food photography, light creates the mood, reveals texture and ultimately decides whether a dish looks mouth-watering or unappealing. Learning how to control light is probably the single most important skill you’ll develop as a food photographer.

When I first started photographing food, I thought, “How hard can this be? I’ve been a portrait photographer for 15 years.”
Well… as it turned out, food photography was completely different.
Learning to control light, rather than simply finding it, completely changed my photography.
The Fundamentals: Direction and Quality
Whether you’re using natural window light or artificial studio strobes, the principles are exactly the same. The key is controlling the direction, quality and colour of your light.
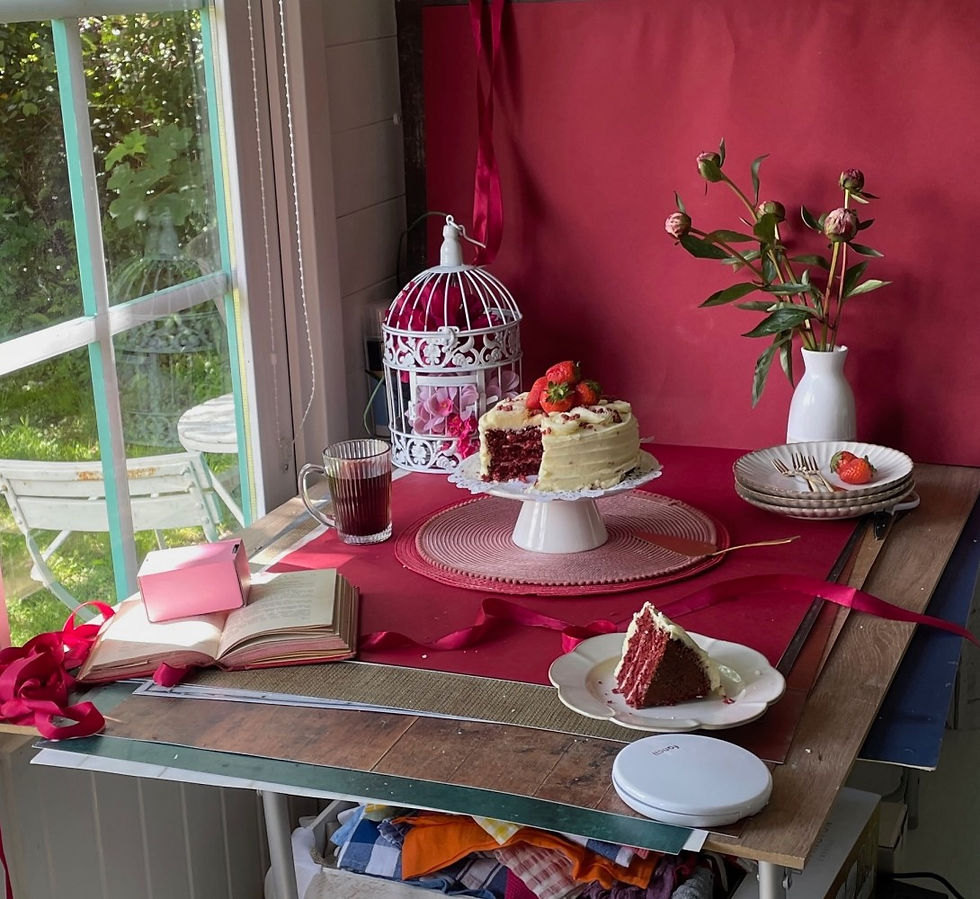
If you’re just starting out, don’t overcomplicate it.
One light is all you need.
Whether that’s a window or a single artificial light, position it to the side or slightly behind your subject. Side lighting reveals texture beautifully, whilst back lighting brings drinks, steam, sauces and translucent ingredients to life.
Add a diffuser to soften the light and you’ll be amazed how far one light can take you.
Master directional light first and you’ll have the foundations for almost every food photograph you’ll ever take.

Embracing the Shadows
Learning to control the shadows is just as important as controlling the light. Shadows are what give a two-dimensional photograph depth and make the food feel three-dimensional.

You can pretty much stay with one light for as long as you wish, but if you enjoy experimenting and want to push your food photography further, you can introduce a second light to add something your main light can’t.
For example, when photographing a bottle, your main light creates the overall mood, whilst a second light positioned behind or to the side can create a beautiful rim light around the edge of the bottle, helping it stand out from the background.
Another example might be a cake where you’ve removed a slice. A second light can gently illuminate the gap, revealing all those beautiful layers and drawing the viewer’s eye exactly where you want it to go.

White reflectors can gently lift shadows where you need more detail, whilst black cards (negative fill) deepen them to add drama.
The aim isn’t simply to make the image brighter or darker. It’s to control where your viewer looks.
The Next Step
As you move into commercial work, your lighting becomes more intentional. Every light should have a job to do.
A third light might be used to illuminate the label on a bottle, add sparkle to a drink or highlight a garnish that’s disappearing into shadow. Small modifiers, such as snoots, allow you to direct light onto one tiny area without affecting the rest of the scene.

The important thing to remember is that you don’t add more lights because you own them.
You add another light because the photograph needs it.
Editing
Adding filters and heavy edits will often spoil beautiful lighting.
Good editing should enhance great lighting, not rescue poor lighting. You can lighten or darken specific parts of the image to guide the viewer’s eye, but avoid reducing the exposure, contrast or colour across the whole photograph. It quickly removes the depth you’ve worked so hard to create.
If in doubt, leave your edit for a couple of hours and come back with fresh eyes. You’ll often spot things you missed the first time around.

The Food Photography Show: Ultimate FAQ
How do you light food photography?
The most flattering approach is to use one large, diffused light source positioned to the side or slightly behind the food. This creates beautiful texture, depth and shape.
How do I create dark and moody food photos?
Use directional light, block ambient room light and use black cards (negative fill) to deepen the shadows where needed. Moody doesn’t mean dark everywhere – it means controlling where the light falls.
How do I create bright white food photos?
Use large, soft light sources, white backgrounds and white reflectors to bounce light back into the shadows, creating a bright, fresh feel.
How do I avoid reflections in food photography?
Start by switching from a silver reflector to a white reflector. Matt props are much easier to photograph than shiny ones, and diffusing your light will help soften unwanted reflections.
How do I photograph drinks?
Back lighting is your best friend. It helps drinks glow beautifully, whilst carefully placed lighting modifiers create clean, attractive reflections on the glass.
What is the biggest lighting mistake beginners make?
Lighting from the front. Front lighting removes texture and depth, making food look flat. Side and back lighting are much more flattering.
Do I need artificial light to be a professional food photographer?
No. Many professional food photographers work exclusively with natural light. Artificial lighting simply gives you consistency and control, particularly on larger commercial shoots.
Whether you’re photographing your first cupcake in your kitchen or shooting for paying clients, here’s what I’d do next: Subscribe to The Food Photography Show on YouTube and start experimenting with your lighting. Master one light first, learn how to control it, and everything else becomes much easier.


Comments